Updated on January 8, 2024
Chatbots today are revolutionizing the way customer support is being done. Gone are the days of clunky, platform-specific chatbots that lock you in and lead to frustration. AI Customer service chatbots, powered by React Native, are the future.
Combine the versatility and reliability of React Native development, along with the human touch and intelligent engagement of chatbots. In this tutorial, we will show you how you can build your conversational engine using React Native.
Before we dive in, here are the prerequisites:
Prerequisites:
- Basic Knowledge of React Native development.
- Programming knowledge – Javascript.
- Node.JS to be installed on your local environment.
- Visual Studio Code (IDE)

Step 1: Setup an account in Kommunicate
If you do not have an account in Kommunicate, you can create one here for free.
Next, log in to your Kommunicate dashboard and navigate to the Bot Integration section. Locate the Kompose section and click on Integrate Bot.
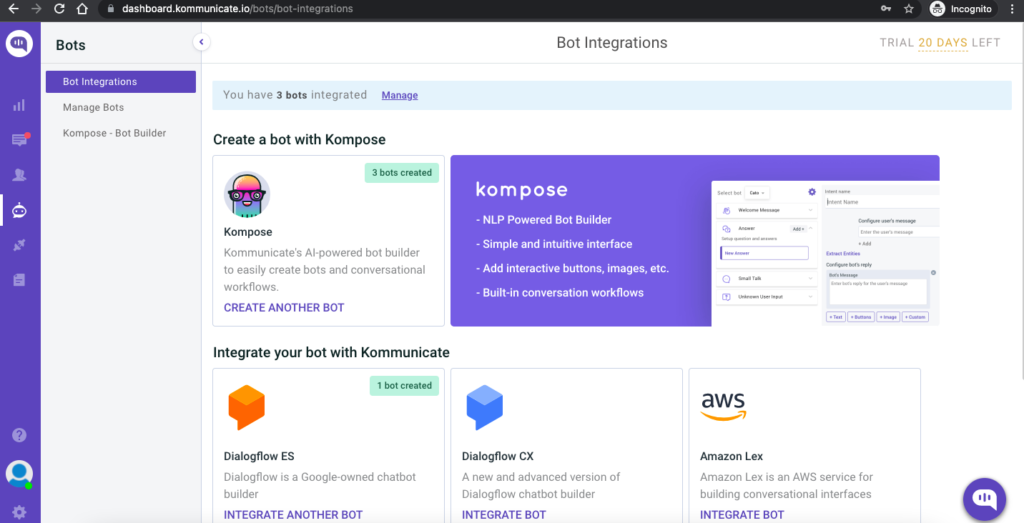
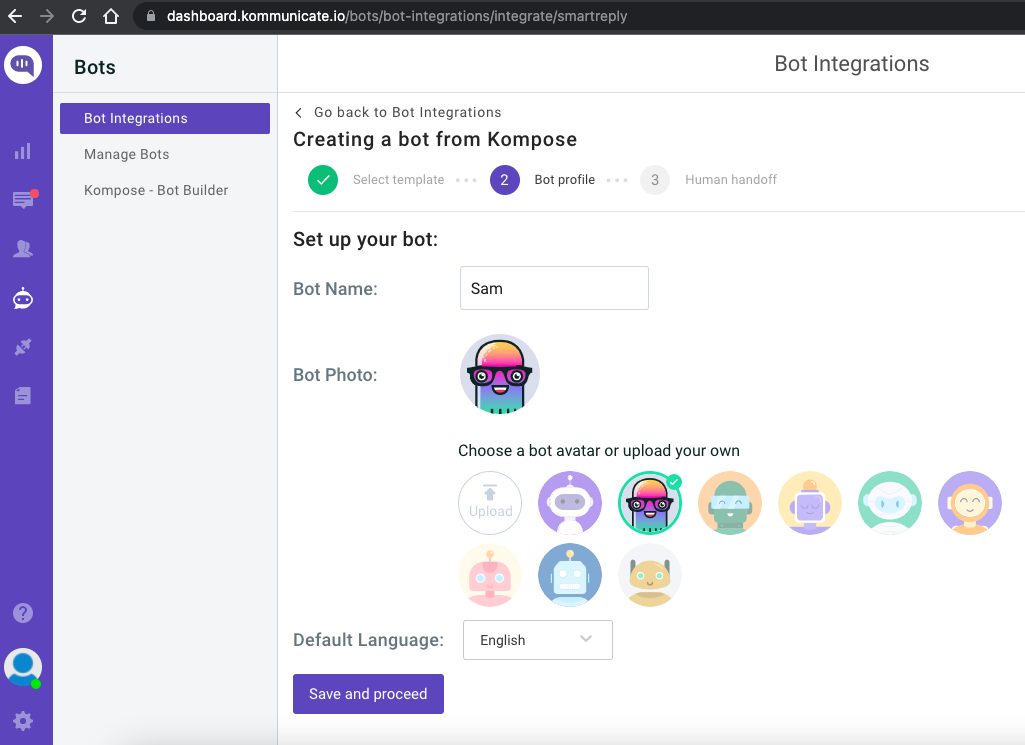
If you want to build a bot from scratch, select a blank template and go to the Set up your bot section. Select the name of your Bot, your bot’s Avatar, and your bot’s default language and click “Save and Proceed”.
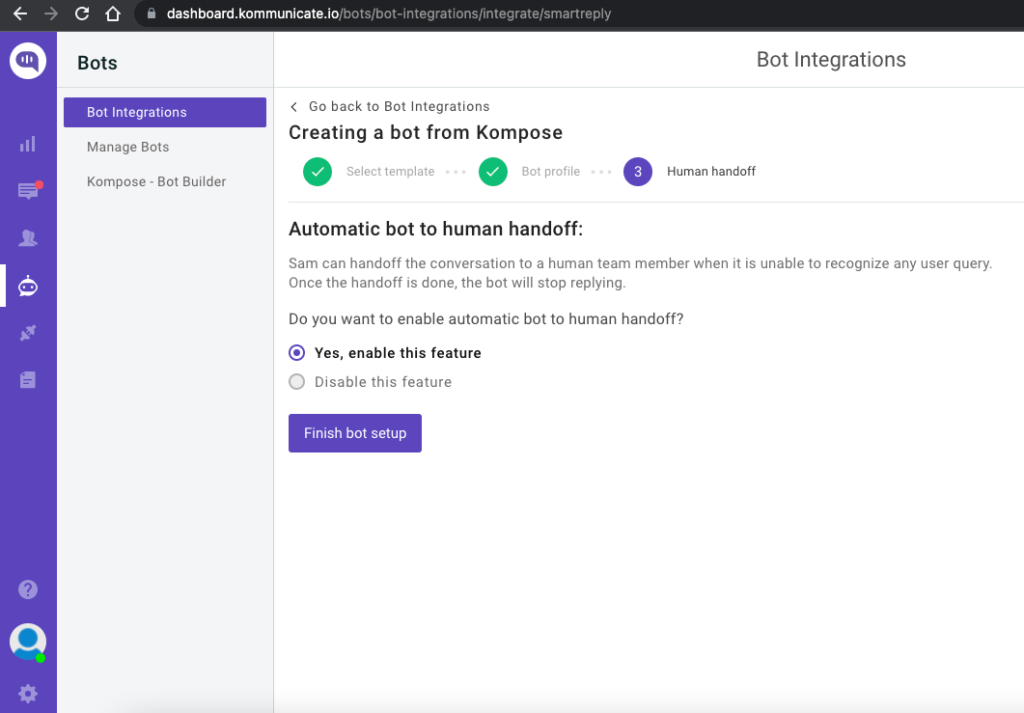
You are now done creating your bot and all you have to worry about now is to “Enable bot to human transfer” when the bot encounters a query it does not understand. Enable this feature and click “Finish Bot Setup.”
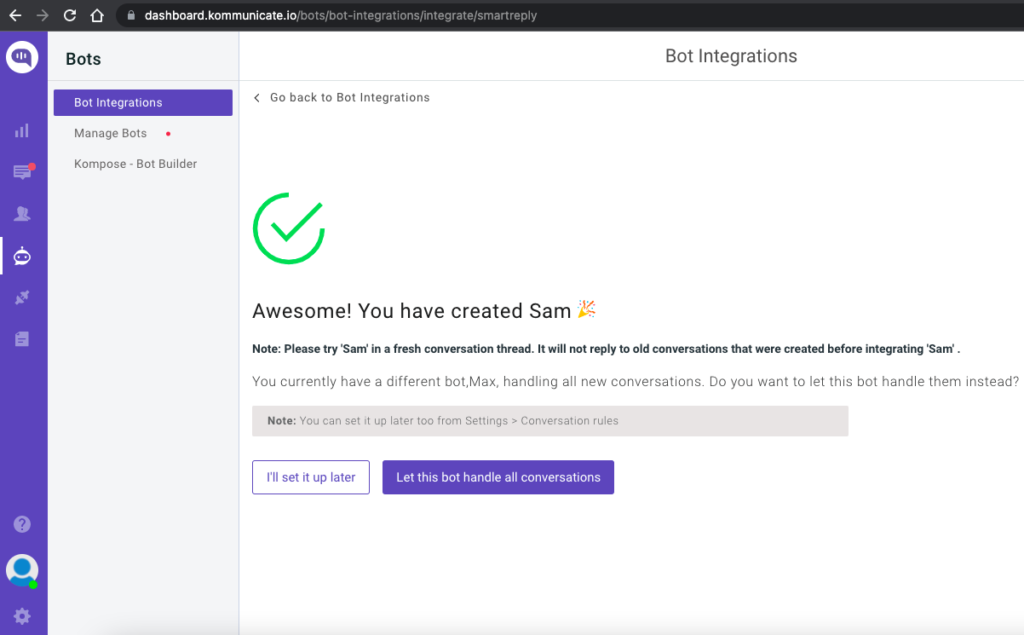
From the next page, you can choose if this bot will handle all the incoming conversations. Click on “Let this bot handle all the conversations” and you are good to go.
Newly created bot here: Dashboard →Bot Integration → Manage Bots.
Step 2: Create welcome messages & answers for your chatbot
Go to the ‘Kompose – Bot Builder’ section and select the bot you created.
First, set the welcome message for your chatbot. The welcome message is the first message that the chatbot sends to the user who initiates a chat.
Click the “Welcome Message” section. In the “Enter Welcome message – Bot’s Message” box, provide the message your chatbot should be shown to the users when they open the chat and then save the welcome intent.
After creating the welcome message, the next step is to feed answers/intents. These answers/intents can be the common questions about your product and service.
The answers section is where you’ve to add all the user’s messages and the chatbot responses.
Go to the “Answer” section, click +Add, then give an ‘Intent name’
In the Configure user’s message section – you need to mention the phrases that you expect from the users that will trigger.
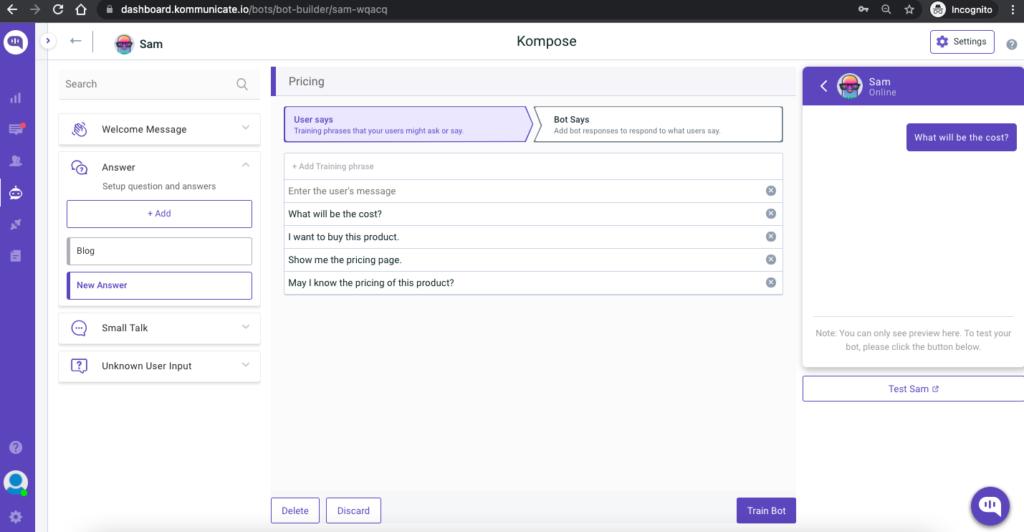
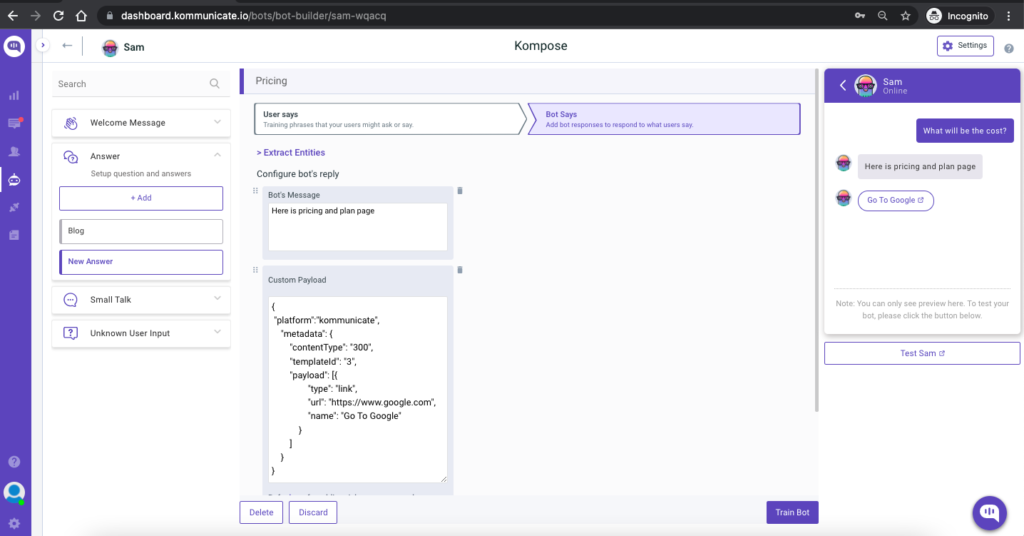
Configure the bot’s reply section – you need to mention the responses (Text or as Rich messages) the chatbot will deliver to the users for the particular message. You can add any number of answers and follow-up responses for the chatbot. I have used custom payload by selecting the “Custom” option in the “More” option.
Once you have configured the responses, you need to click on “Train Bot” which is at the button right and to the left of the preview screen. Once successfully trained, a toast “Anser training completed” will come at the top right corner.
Step 3: Setup the React Native chatbot development environmen
https://reactnative.dev/docs/environment-setup
Step 4: Create a React Native app
Create a new React Native app (my-app) by using the command in your terminal or Command Prompt:
npx react-native init my-app
Step 4: Now, navigate to the my-app folder
cd my-app
Step 5: Install Kommunicate to your project
To add the Kommunicate module to your React Native application, add it using npm:
npm install react-native-kommunicate-chat --save
Step 6: Add Kommunicate code to your project
Navigate to App.js in your project. By default, a new project contains demo code which is not required. You can remove those codes and write your code to start a conversation in Kommunicate.
First, import Kommunicate using:
import RNKommunicateChat from 'react-native-kommunicate-chat';
Then, create this a method to open conversation before returning any views:
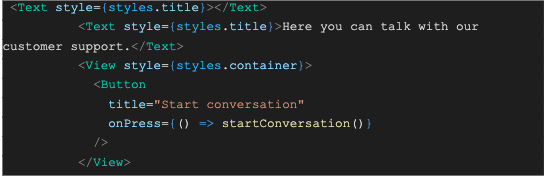
Next, we need to add a button, which when clicked would open a conversation. Add these React elements and return them.
const App: () => Node = () => {
const isDarkMode = useColorScheme() === 'dark';
const backgroundStyle = {
backgroundColor: isDarkMode ? Colors.darker : Colors.lighter,
};
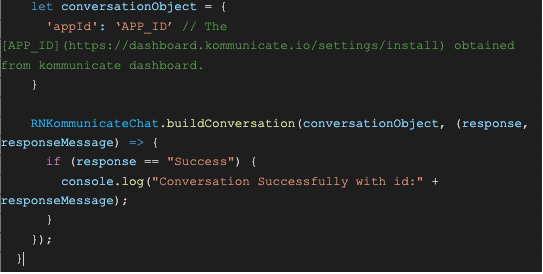
startConversation = () => {
let conversationObject = {
'appId': 'eb775c44211eb7719203f5664b27b59f' // The [APP_ID](https://dashboard.kommunicate.io/settings/install) obtained from kommunicate dashboard.
}
RNKommunicateChat.buildConversation(conversationObject, (response, responseMessage) => {
if (response == "Success") {
console.log("Conversation Successfully with id:" + responseMessage);
}
});
}
return (
<SafeAreaView style={styles.con}>
<StatusBar barStyle={isDarkMode ? 'light-content' : 'dark-content'} />
<ScrollView
contentInsetAdjustmentBehavior="automatic"
style={backgroundStyle}>
<Header />
<View
style={{
backgroundColor: isDarkMode ? Colors.black : Colors.white,
}}>
<Text style={styles.title}></Text>
<Text style={styles.title}>Here you can talk with our customer support.</Text>
<View style={styles.container}>
<Button
title="Start conversation"
onPress={() => startConversation()}
/>
</View>
</View>
</ScrollView>
</SafeAreaView>
);
};
FAQ: How to Build a Chatbot with React native
Are you still afraid of building your own chatbot with react native? Just take a deep breath and read on. Here are some of the most frequently asked questions about creating a chatbot with react native. It should give you some more insights into the React native chatbot creation process.
How do you use the React Chatbot kit?
Here's a step-by-step guide on how to use React Chatbot Kit in your React application:
- Install React Chatbot Kit:
npm install react-chatbot-kit
- Import the necessary dependencies:
import Chatbot from 'react-chatbot-kit';
import 'react-chatbot-kit/build/main.css';
- Create the necessary files:
The chatbot requires three dependencies in order to function. Create a directory in your project to keep the files related to the chatbot and create the following three files:
MessageParser.js
ActionProvider.js
config.js
- Initialize the chatbot:
In the component where you want to display the Chatbot, initialize the Chatbot in the following way:
class MyChatBot extends React.Component {
render() {
return (
<div>
<Chatbot
messageParser={MessageParser}
actionProvider={ActionProvider}
config={config}
/>
</div>
);
}
}
This will create a new instance of the Chatbot and render it in your React application.
- Provide a message parser:
The message parser is responsible for processing user input and extracting entities from the user's message. Create a MessageParser.js file and implement the parseMessage() method. This method should take a user message as input and return an object containing the extracted entities.
- Provide an action provider:
The action provider is responsible for taking an action based on the user's message. Create an ActionProvider.js file and implement the handleAction() method. This method should take an action object as input and perform the necessary action.
- Configure the chatbot:
Create a config.js file and export an object with the following properties:
export default {
initialMessage: 'Hello there!',
botAvatar: 'https://example.com/bot-avatar.png',
userAvatar: 'https://example.com/user-avatar.png',
};
This will configure the chatbot with the initial message, bot avatar, and user avatar.
With these steps, you have successfully initialized the React Chatbot Kit in your React application and can start building your chatbot. You can extend the chatbot by creating custom components, hooks, and tools to fit your specific needs.
How do I make a call app in React native?
Creating a call app in React Native involves several steps, including setting up the project, implementing calling functionalities, and integrating with the device's calling system. Here's a general overview of the process:
- Project Setup:
- Install React Native and its dependencies:
- Bash
npm install -g react-native
- Create a new React Native project:
- Bash
npx react-native init CallApp
- Calling Functionalities:
- Install the react-native-phone-call library:
- Bash
npm install react-native-phone-call
- Import the library and use its methods to initiate calls:
- JavaScript
import PhoneCall from 'react-native-phone-call';
const handleCall = () => {
const phoneNumber = '1234567890';
const args = {
number: phoneNumber,
prompt: true,
};
PhoneCall.call(args).catch(console.error);
};
- Device Integration:
- Request permissions to access the device's calling system:
- JavaScript
import { Platform } from 'react-native';
import Permissions from 'react-native-permissions';
const requestCallPermission = async () => {
if (Platform.OS === 'android') {
const granted = await Permissions.askAsync(Permissions.PERMISSIONS.ANDROID.CALL_PHONE);
if (!granted.granted) {
alert('Call permission denied!');
}
}
};
- Handle incoming calls and manage call states:
- JavaScript
import CallManager from '@react-native-community/call-keep';
CallManager.startCallAudio();
CallManager.answerCall();
CallManager.endCall();
- User Interface:
- Create a user interface that allows users to input phone numbers and initiate calls:
- JavaScript
import React, { useState } from 'react';
import { View, TextInput, Button } from 'react-native';
const CallScreen = () => {
const [phoneNumber, setPhoneNumber] = useState('');
const handleCall = () => {
// Implement calling functionality using PhoneCall library
};
return (
<View>
<TextInput
value={phoneNumber}
onChangeText={setPhoneNumber}
placeholder="Enter phone number"
/>
<Button title="Call" onPress={handleCall} />
</View>
);
};
Remember to test your call app thoroughly to ensure it works as expected and handles different scenarios, such as incoming calls, call states, and error handling.
Can I make my own AI chatbot?
Creating your own AI chatbot is a simple 4 step process. For this, you will need a Kommunicate account and 10 minutes of your time.
To create your own AI chatbot:
- Sign up to Kommunicate.
- Navigate to the ‘Bot Integration‘ section on the left panel of the dashboard and click on Kompose. Use Flow Designer to visualize and design the flow of chat conversations.
- Copy the Javascript code from the install section under Settings and paste it above the closing body tag on the page where you want the chat widget to appear.
- Go to Conversation Rules enable assign new conversations to the bot and select your newly configured bot from the dropdown.